
GIF: http://giphy.com/gifs/ship-canal-container-9h92ggQve1Wxy
Late last year, Docker snapped up cross-cloud container management service Tutum, but it wasn’t clear how the acquired company’s handiwork would manifest under the Docker brand. Tutum was built from the ground up as a Docker tool. It gives visibility into containers, and enables a team to create, start, terminate or redeploy as needed. It also provides a dashboard view of all of the containers under team management. Tutum is now Docker Cloud. Docker Cloud is a new service by Docker that implements all features previously offered by Tutum plus integration with Docker Hub Registry.
A group of us in BC are looking for ways we can provide a more sustainable opened tech infrastructure to BC higher education. We have begun looking for approaches to shared WordPress hosting. I have been playing with Stackfiles and Docker Compose for the last few weeks and starting to get a clearer picture of how we might sustainably provide hosting for both dev and production WordPress hosting for BC open education initiatives.
As well as deploying and managing hosts on the supported cloud providers (EC2, Azure, etc), Docker Cloud can use any Linux host as a node to deploy containers to. For this, you install an agent which will allow you to connect the Docker Cloud dashboard to your infrastructure. I went ahead and connected our new EduCloud node to Docker Cloud last week and started experimenting with how services are managed. Services/sites can be setup directly quickly using the Docker Cloud web interface. Services/sites are managed via ‘stacks’ which are defined using Docker Compose. Compose is a tool for defining and running multi-container Docker applications. This ‘stackfile’ contains the instructions required to pull from required repositories (eg: Docker Hub, Github, etc) and configure your application’s services. Then, using a single command, you can create and start all the services.
Once a stackfile is defined, it can be used to deploy and/or redeploy as many copies of an application as you need. I found a ‘ready to deploy’ WordPress stackfile at this registry:
wordpress:
image: tutum/wordpress-stackable:latest
links:
– db
ports:
– “80:80”
environment:
DB_NAME: wordpress
DB_USER: admin
DB_PASS: “**ChangeMe**”
db:
image: tutum/mysql:5.5
environment:
MYSQL_PASS: “**ChangeMe**”
To test out Docker Cloud/Compose on EduCloud I decided to reserve the domain opened.ca, create 2 subdomains, and map a separate WordPress installation to each subdomain. I made 2 DNS entries and pointed them all to our EduCloud host.
Without going too far down the Docker technical docs in this post, it is important to know that traffic between containers & external networks runs on Ports. No 2 containers be exposed on the same public port for HTTP traffic (Port 80/443) without a proxy out in front to handle traffic. To accomplish this I decided to use nginx-proxy, a container running nginx and docker-gen. docker-gen generates reverse proxy configs for nginx and reloads nginx when containers are started and stopped thereby automating all that port mapping between containers and the public IP/Ports. All that is needed to unsure the reverse proxy works properly is to start your WordPress Docker container passing the VIRTUAL_HOST variable.
That means adding 1 line to my Stackfile cribbed from Stackfile.io above and tweaking another:
wordpress:
image: tutum/wordpress-stackable:latest
links:
- db
ports:
- "5000:80"
environment:
VIRTUAL_HOST=tannismorgan.opened.ca
DB_NAME: wordpress
DB_USER: admin
DB_PASS: ----------
db:
image: tutum/mysql:5.5
environment:
MYSQL_PASS: -----------
As I will have 2 stacks, I will need 2 internal ports. For the purposes of this test I am using 5000 and 5001. All of these map to Port 80/443 facing the web. nginx-proxy also needs to know what domains to listen for along with their associated internal port so I added the VIRTUAL_HOST variable and indicated the internal port for the tannismorgan.opened.ca test Wordpress container (5000) to ensure sure the incoming request is routed correctly.
I updated the 2 stackfiles and clicked ‘Create & Deploy’. From start to finish, provisioning these WordPress sites took minutes.
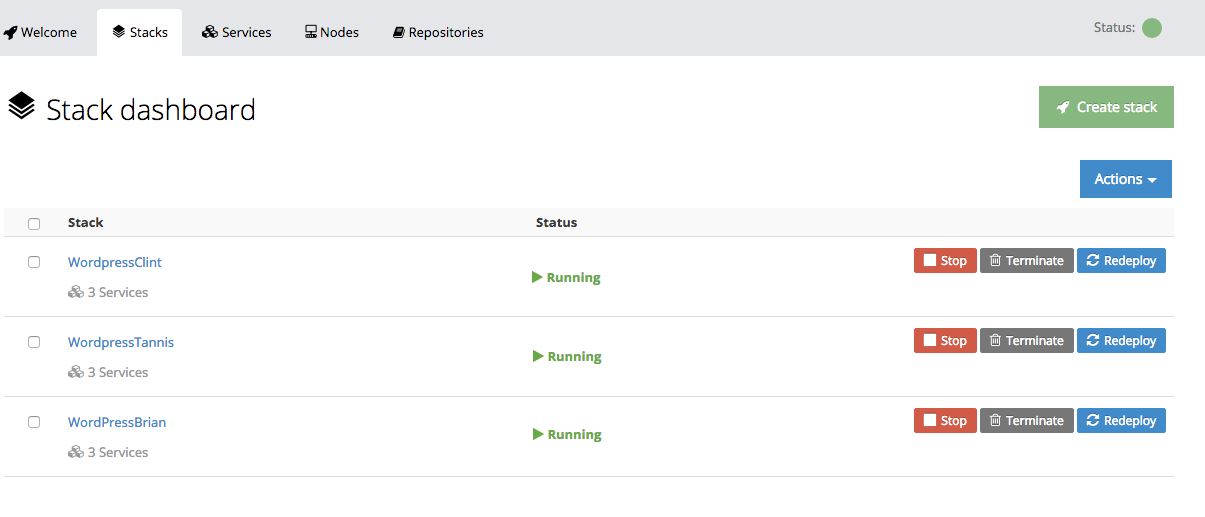
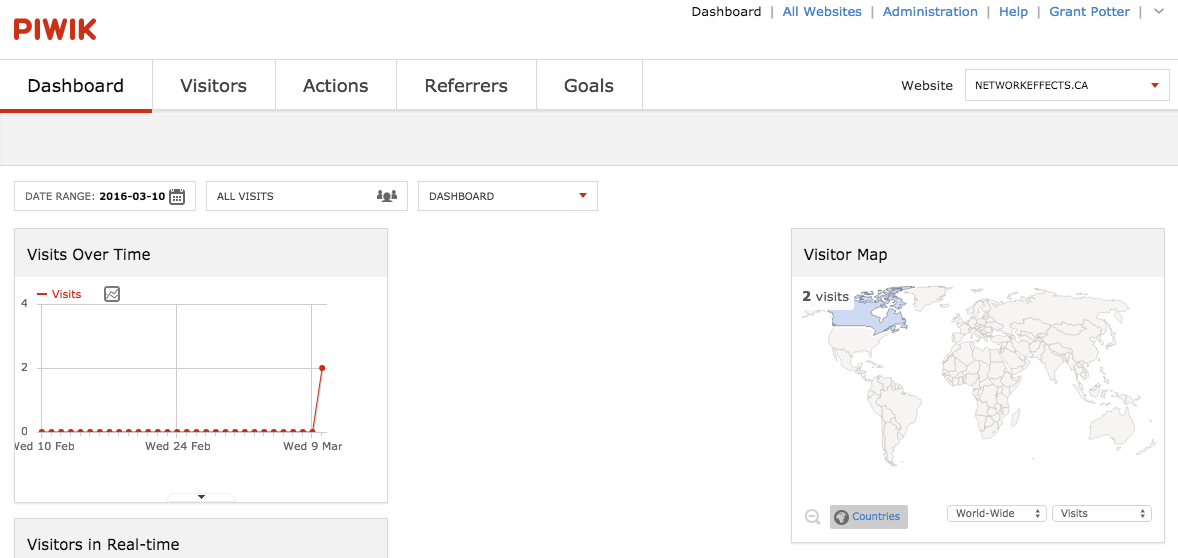
If you geolocate any of these subdomains, you will see that they all indicate they are hosted in Kamloops, BC (when, in fact, they are hosted on EduCloud using clever networking arrangement from TRU-IT folks.)
Docker Cloud could be a dream for multi-tenant WordPress updates/customizations. Simply make an exact copy of an existing WordPress stack, map your new development domain, and deploy your development spaces. When your development is ready for production, change the VIRTUAL_HOST variable on the container to update your domain. Done.
This is a simple example of a multiple MySQL+Wordpress Docker container stack running on EduCloud. There are hundreds of applications available at the Docker Hub. Looking forward to playing more and learning more with Docker Cloud and Docker Compose this week as well as exploring how Docker Cloud might be used for our inter-institutional devops.